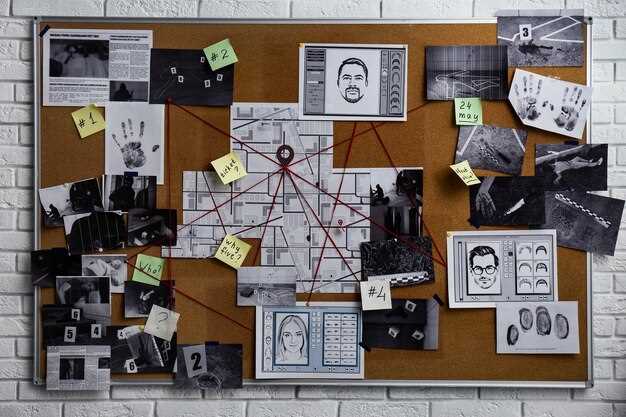
Start with collecting a diverse range of materials related to your theme. An inspiration board thrives on variety, so include a mix of images, color swatches, textures, and even typography. Make use of both digital and physical formats to broaden your sources. Incorporate elements that resonate with the mood you want to capture, ensuring that they align with your primary concept.
Scan through various creative platforms like Pinterest, Behance, or art blogs to find visual stimuli that align with your project. Be selective and save the pieces that truly speak to your artistic instincts. Use apps or software dedicated to mood boards to organize your selections efficiently, allowing for easy modifications during the creative process.
Pursue a balance between consistency and contrast. While consistency provides cohesion, subtle contrasts can offer unexpected depth and intrigue. Experiment with different arrangements, shifting elements around until they form a coherent narrative. Test various compositions to find one that best represents your creative vision, and be open to iterations.
Introduce personal touches to enhance originality. Incorporate sketches, notes, or any original content that directly reflects your artistic perspective. Your personal input not only adds uniqueness to your board but also continually inspires new ideas. Allow your inspiration board to be a dynamic tool, evolving as your project progresses and your ideas grow.
Structuring Inspiration Boards for Optimal Creativity
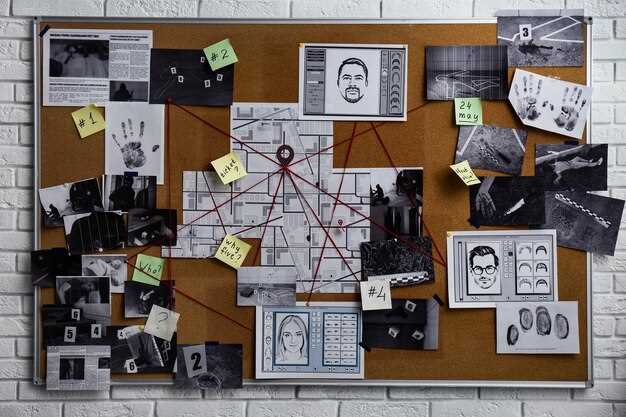
Start by categorizing your inspiration board into distinct themes or sections. This approach helps provide clarity and focus on specific areas, enabling you to harness creativity without being overwhelmed. Introduce sections such as color schemes, textures, patterns, and moods to ensure a well-rounded collection of stimuli.
Utilize a mix of both digital and physical elements to stimulate different senses. While digital boards offer convenience and endless options, incorporating physical elements like fabric swatches or printed photographs can make the board more tactile and engaging.
Organize elements in a manner that promotes visual harmony. Arrange components by size, shape, or color to create a coherent and pleasing aesthetic. This not only enhances the board’s efficiency but also facilitates easier navigation, allowing for effortless pattern recognition and idea generation.
Incorporate contrasting elements to challenge your perspective and ignite innovation. Include opposing colors, or juxtapose modern designs with vintage elements, encouraging a broader outlook on possibilities and solutions.
Regularly update and refresh your board to keep the inspiration dynamic and aligned with your evolving artistic vision. Remove elements that no longer resonate and introduce new inspiration reflecting current trends or personal growth. This approach ensures your board serves as a perpetual source of fresh ideas.
Lastly, encourage collaboration by sharing your board with others and inviting feedback. This not only enriches the board with diverse perspectives but also fosters a community of creativity, leading to more original and impactful art.
How to Curate Visual Elements That Spark Creativity
Begin by organizing your workspace with a mix of textures, colors, and patterns that intrigue you. Gather an array of materials such as fabric samples, paint swatches, magazine cutouts, and found objects. Each item should resonate with the project’s emotion or theme you wish to explore.
Create a table to categorize visual elements based on their source and emotional impact:
| Source | Element Type | Emotional Impact |
|---|---|---|
| Nature | Colors and Patterns | Calming |
| Urban Environment | Textures and Lines | Energizing |
| Photography | Composition and Light | Inspiring |
| Historical Art | Styles and Techniques | Nostalgic |
Utilize digital tools like Pinterest or Adobe Spark to gather and organize your inspirations virtually. Create boards or collections that align with different facets of your project, like color palettes or thematic sketches. Pin only what evokes a strong reaction to avoid clutter.
Regularly edit your selections. Exchange outdated inspirations for fresh finds that challenge your perspective. Look for new trends in design blogs or innovative exhibitions that push your creative boundaries.
Collaborate with peers or mentors to gain insights into your curated collection. Feedback can reveal overlooked potential or inspire entirely new directions. Engage in discussions that sharpen your vision and challenge your choices.
Finally, trust your instincts. The elements you choose should resonate with your unique creative voice. When assembling your inspiration board, let your intuition guide the arrangement, ensuring it propels you towards original artworks that reflect your artistic identity.
Balancing Colors and Textures for Cohesive Style
Choose a primary color palette that reflects the mood and theme you aim to convey. Limit yourself to three to five colors to ensure focus. Augment these colors with varying shades and tints to add depth without overwhelming the senses.
- Accent with Contrasts: Incorporate one or two accent colors for contrast. This brings visual interest and emphasizes specific areas of the board.
- Embrace Neutral Base: Use neutral colors as grounding elements. They allow brighter colors and bold textures to stand out.
- Play with Texture: Integrate various textures such as glossy, matte, rough, or soft finishes. These add tactile interest, keeping the board dynamic and engaging.
- Create Balance: Distribute colors and textures evenly across the board. Avoid clustering similar elements to maintain harmony.
- Use Textures as Transitions: Utilize textures to transition between different colors or themes. This provides a cohesive flow and minimizes abrupt changes.
By thoughtfully combining colors and textures, you can craft an inspiration board with a cohesive style that acts as a compelling visual narrative. Keep experimenting with different combinations to discover what resonates best with your artistic vision.
Incorporating Text and Quotes to Guide Artistic Direction
Select a theme or message that resonates with your artistic vision. By choosing quotes or text that align with your desired emotion or story, you add depth to your inspiration board. Instead of overwhelming yourself with numerous options, focus on a few impactful words or phrases that encapsulate your intentions.
Next, categorize your text and quotes by their relevance to specific aspects of your project. Structure them within a table for clarity:
| Category | Example Quote/Text |
|---|---|
| Emotion | “Art should comfort the disturbed and disturb the comfortable.” – Banksy |
| Color Inspiration | “Nature always wears the colors of the spirit.” – Ralph Waldo Emerson |
| Concept | “Every artist was first an amateur.” – Ralph Waldo Emerson |
| Technique | “Art is not what you see, but what you make others see.” – Edgar Degas |
Use typography creatively by experimenting with font styles and sizes. This will visually enhance your board and reinforce the theme. Consider how each text element can interact visually with images, colors, and textures on your board. Consistent font styles across similar themes help maintain harmony, while contrasting styles can highlight specific areas of interest.
Reflect on the emotional impact of your chosen quotes. Texts should act as a touchstone that you return to during the creative process. Revisiting these words can inspire you when progress slows, helping maintain focus and drive artistic decisions.
Integrating Diverse Sources of Inspiration for Unique Perspectives
Explore a combination of nature, technology, and historical art movements to gather contrasting ideas. Visit botanical gardens or national parks to observe organic shapes and colors that can inform your palette choices. Pair these observations with modern digital design trends by analyzing current UI/UX examples on platforms like Behance or Dribbble.
Capture your on-site discoveries with photos or sketches and juxtapose them with abstract digital art pieces you admire. This practice helps establish a dialogue between the physical and the digital realms, fostering innovative design approaches. Say, take note of how the minimalist style emphasizes negative space and how you might integrate similar strategies from industrial design into your artwork.
Revisit classical artworks and consider their use of form, light, and technique. The juxtaposition of the Baroque emphasis on light and detail with contemporary digital simplicity can lead to a refreshing aesthetic tension in your work. Play with scale and proportion by drawing room for experimentation.
To bridge these inspirations, create collages combining your images, sketches, and digital screenshots. Tools like Adobe Photoshop or Procreate offer seamless ways to layer elements, providing a sandbox for your imagination. Experimentation with different media – paint, digital rendering, mixed media – will bring depth to your work, ensuring each piece represents an original vision.
Choosing the Right Tools and Platforms for Digital Boards
Start with identifying platforms that offer user-friendly interfaces and diverse design options. Look for those that provide flexibility in layout and style to accommodate varied artistic preferences.
- Pinterest: Excellent for creating mood boards with a wealth of inspiration at your fingertips. Utilize its vast database by searching for specific themes and curating a board that reflects your vision.
- Trello: A powerful tool for organizing ideas. It allows you to categorize your inspirations, add notes, and seamlessly reorder them as your concept evolves.
- Milanote: Perfect for creatives requiring a more structured approach. Its drag-and-drop interface makes it easy to compile images, notes, and links in a visually appealing manner.
- Canva: Offers a multitude of templates tailored for creating visual boards. Its intuitive design tools help you craft custom layouts effortlessly, ideal for bringing your unique style into the digital sphere.
Evaluate storage solutions that ensure easy access and sharing. Platforms offering cloud integration facilitate seamless collaboration and backup of your work. Consider the following:
- Google Drive: Allows for easy sharing and collaboration with real-time updates, ensuring all stakeholders have access to the latest version of your board.
- Dropbox: Known for its reliable file storage and synchronization, it’s an effective choice for archiving high-resolution images and important documents.
Finally, prioritize tools that support both desktop and mobile devices. This flexibility will enable you to capture inspiration instantly, wherever you are, and maintain the flow of your creative process.
Translating Inspiration Boards into Illustrative Compositions
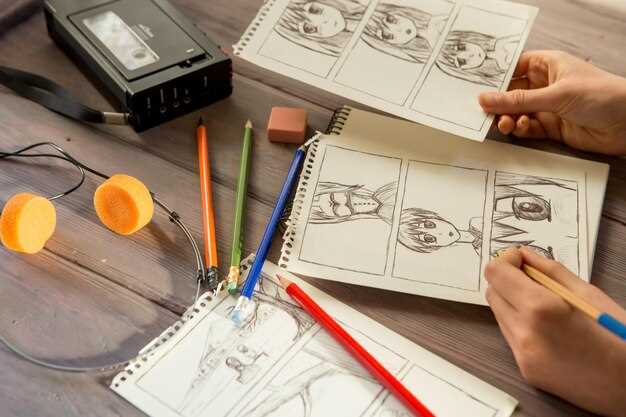
Start by identifying the core elements within your inspiration board. Focus on colors, patterns, textures, and moods that stand out. This step ensures a cohesive base for your composition. Prioritize these elements by their significance to your vision.
- Select Key Colors: Choose a small palette from your board’s color scheme to maintain harmony in your artwork.
- Identify Dominant Shapes and Patterns: Extract repeating shapes or patterns. These offer visual continuity.
- Incorporate Textures: Use textures to engage the senses and add depth. For example, a rough texture can be mirrored with stippling techniques.
Develop a narrative based on the imagery and emotions your board evokes. This story guides the illustrative process and gives your composition direction. Use these steps to craft your narrative:
- Determine a Central Theme: A clear theme provides focus. It could be a concept like “growth” or an emotion such as “nostalgia.”
- Outline Story Elements: Identify characters, settings, and actions. Keywords from your board help shape these elements.
- Create a Storyboard: Arrange sketches to visualize the flow and progression of your ideas.
Experiment with different mediums and techniques to transform your ideas into reality. Begin with simple sketches and gradually introduce complexity:
- Sketch Freely: Don’t constrain your initial ideas. Loose sketches offer room for exploration.
- Play with Light and Shadow: These elements can dramatically alter mood and focus.
- Incorporate Mixed Media: Combining digital and traditional media often yields dynamic results. Consider digital enhancements or collage techniques.
Refine your composition through feedback. Share drafts with peers or mentors familiar with your artistic style. Constructive insights lead to improvements and uncover novel perspectives you might have missed.
From Concept to Sketch: Building a Visual Blueprint
Translate your initial ideas into precise sketches by gathering relevant imagery that resonates with your vision. Create a structured mood board using a tool like Pinterest or a physical board for tangible materials, ensuring it reflects various elements such as color palettes, textures, and composition styles.
Analyzing each piece, identify recurring themes and visual connections. Focus on areas that evoke a strong response, and consider how these could transform into original components of your artwork. Strive for variety in your selected images to allow flexibility and innovation in your creative process.
Develop a preliminary sketch incorporating the curated elements as a visual guide. Use quick, decisive strokes to capture the essence rather than details. This sketch serves as a blueprint, guiding your choices in color, form, and balance as you progress. Simplify complex ideas to their core components, ensuring your final piece maintains focus and clarity.
Regularly compare your sketch with the inspiration board, aligning your creative choices with the intended artistic direction. Make adjustments where necessary, ensuring each element serves the overall vision. Finally, refine your sketch to a clear, cohesive outline to set a strong foundation for your artwork.
Layering Dimensions: Techniques for Depth and Interest
Create compelling artwork by incorporating varied textures and materials that complement one another. Start with a base layer using materials like canvas or textured paper. Each addition layers a unique attribute, capturing attention and leading viewers through your creation.
Experiment with overlays and transparencies: Use tracing paper or thin fabrics like tulle to allow underlying elements to peek through, adding intrigue and complexity. This technique creates a multidimensional effect, encouraging the observer to engage deeper and unearth hidden details.
Integrate visual contrast: Combine glossy surfaces with matte finishes, or juxtapose dark shades against lighter hues to add a dynamic tension. This interplay highlights focal points and guides the viewer’s eye across the artwork, maintaining their interest.
Utilize scale and proportion: Varying the size of shapes or objects within your design can create a sense of depth. Larger elements seem closer, while smaller ones recede, offering the illusion of a three-dimensional space and inviting exploration.
Incorporate shadows and highlight: Use light and shadow to sculpt your piece. Subtle shading can make elements pop, adding realism and texture. Highlights suggest direct light, enhancing depth and making your work more lifelike.
All these techniques, when woven together thoughtfully, transform a flat project into a captivating piece where viewers can perceive depth and layers, driving a stronger emotional connection to the art.
Creating Harmony in Composition Through Design Principles
Start with establishing a clear focal point. Choose one feature or element in your design to grab the viewer’s attention immediately. It ensures your message is direct. Consider size, color, or an interesting shape to make it stand out.
Balance your composition by distributing elements evenly, achieving either symmetrical or asymmetrical arrangements. Symmetrical designs evoke a sense of formality and stability, while asymmetrical ones feel more dynamic and engaging. Select the style that best fits your artistic intent.
Apply the rule of thirds. Divide your composition into nine equal parts using two horizontal and two vertical lines. Place crucial elements at the intersections to create more interest and energy.
Use contrast effectively to differentiate between various components of your design. This can be through color, texture, or scale, providing visual variety and drawing attention where needed.
Keep an eye on proportion and scale, ensuring that the size relationship between objects maintains the integrity of the overall composition. Larger elements versus smaller ones can depict significance or focus.
Cohesion is essential for creating unity in your design. Use a consistent color palette and repeat elements like shape or texture to tie different aspects together, crafting a polished and completed artwork.
Integrate negative space judiciously. Allow the breathing room between your elements to prevent clutter, helping the viewer absorb the information without feeling overwhelmed. This creates a pleasing aesthetic and supports the visual hierarchy.
By thoughtfully applying these design principles, you’ll achieve harmony in your artwork, ensuring that all parts contribute optimally to the whole.
Video:
Start a New Sketchbook With ME | Art Vlog?
Start a New Sketchbook With ME | Art Vlog?
Q&A:
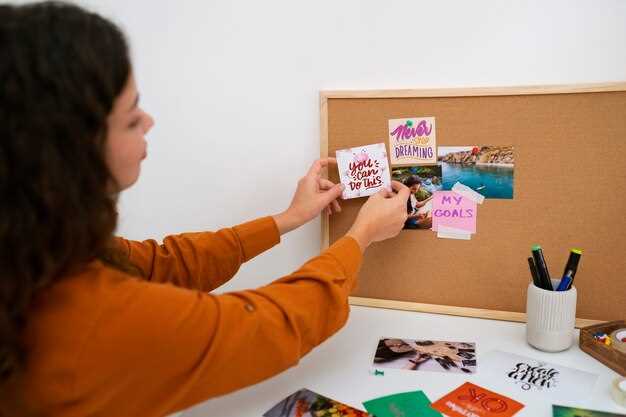
How can I effectively choose images for my inspiration board?
Choosing images for your inspiration board involves considering the theme or concept you want to explore. Start by collecting images that resonate with you emotionally or visually. They can be from magazines, online sources, or your own photographs. The key is to select images that inspire creativity and represent the essence of the concept you are working on. Once you have a collection, arrange them in a way that feels coherent and balanced, allowing new ideas to emerge from the visual relationships between images.
What materials are needed to create a physical inspiration board?
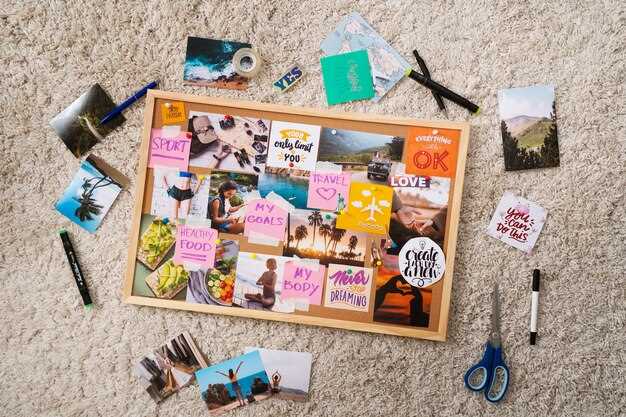
To create a physical inspiration board, you will need a sturdy backing material such as a corkboard, foam board, or poster board. You’ll also require scissors, glue, push pins, or double-sided tape to attach your images. It can be helpful to have a variety of art supplies on hand, such as markers or paints, to add personal touches. The goal is to make a tangible collection that you can touch and interact with, which can stimulate creative thinking.
Are digital inspiration boards as effective as physical ones?
Digital inspiration boards offer the advantage of accessibility and ease of editing, allowing you to quickly reorganize and update your board as needed. They can be created using software or apps, offering features like layering and zooming for a detailed exploration of ideas. However, some artists find physical boards more inspiring due to their tactile nature and the physical interaction they allow. Ultimately, the effectiveness depends on your personal preferences and workflow.
How often should I update my inspiration board?
The frequency of updating your inspiration board depends on the projects you are working on and how often new ideas or inspirations come to you. Some artists update their boards regularly, incorporating new images and ideas as they arise. Others might have long-term boards that evolve less frequently. It’s important to refresh your board whenever you feel it no longer reflects your current creative direction.
Can inspiration boards help overcome creative blocks?
Yes, inspiration boards can be an effective tool for overcoming creative blocks. By visually organizing your thoughts and inspirations, you create a space for new ideas to emerge. Seeing different elements side by side can lead to unexpected associations and spark creativity. This method provides a structured way to explore new perspectives and can serve as a catalyst for generating original artworks.
